Showing posts with label How To'sDay. Show all posts

Tuesday, June 26, 2012

How To... Make a tufted headboard

Remember last month when I mentioned that I told J I'd finish a project before starting another?  Well the new project I had in mind was an upholstered headboard for our bed.  Our bed is against a window, and the windowsill tends to dig into my back when I try to sit up in bed and read blogs.  J had an old wooden headboard hanging out in our overflow guest/storage room upstairs, so I decided to use that for the base.  I added the headboard to our bed for a couple weeks to get a feel for height, and studied up on how to make the transformation.

Let me stop here and say, if you want to tackle a project like this, you need to go read Jenny's tutorial at Little Green Notebook here (and the post she links to in that post).  I followed her directions pretty closely, and when I reached out with questions via email, she responded quickly and most helpfully!

So in pictures, here's what we did to take this (yes, it's turned on its side):
to this:

First, I cut down the legs to bring the headboard to about ten inches above the mattress.  Because we're in front of a window, I didn't want something taller.  If J had a footboard with this bedroom set, I probably would have used it, instead!

Then I sketched out some options to give J an idea of what I had in mind.  We decided to go with one row of buttons (so pretty basic tufting) with large buttons.  Here are the sketches I showed J (No, this one shouldn't be on it's side...) and after playing with some other options, we chose the one on the left below.

So then I cut the foam and laid out the project.  We used two kinds of foam:  3" foam for the main part of the headboard and 1" foam rolled into a 4 " roll to create the looked of a rolled headboard.  Those were pieced together like this so that it was a smooth transition:

I measured out where the buttons would go and marked the headboard and foam (um...with gel food coloring...my pen wouldn't work and I was doing this part in the kitchen...  Don't laugh.  It worked.)

Then I just drilled the holes in the headboard, attached the foam and wrapped everything in batting to further smooth the edges (a step I apparently managed not to photograph).

And then I went shopping.  I couldn't make up my mind, and ended up making multiple trips to multiple stores in an effort to find inspiration.  I ended up stumbling across a bolt of light blue duck fabric in the very back of JoAnns.  It goes well with the slightly modern (aka Ikea) masculine look we've got in this room.

I made buttons (well, J made most of them while we learned how to make covered buttons), carved out the holes in the foam per Jenny's instructions, and got to work.  I should tell you, this part was harder than I expected.  Not hard, mind you, just more than I thought.  I took it apart a couple times, and may still do that once more.  I can definitely see why having an assistant help out is a good idea.  Unfortunately, Zep just wasn't as helpful as, say, someone with opposable thumbs would have been.

I started with one of the center buttons (I have a total of eight) and then measured across to be sure I maintained somewhat even spacing.  
It looks like this in the back, and I completely followed Jenny's instructions here.  I'd also recommend doing the stapling flat against the ground (or employing more muscle when stapling).  I ended up hammering in each staple to hold the thread.


After I got all of the buttons in, it looked like this:

Then I started the process of pleating the extra fabric and stapling it in place.  Quite frankly, I think this is where I went wrong.  If I were to redo this (which may happen yet), I'd plot the points out on the fabric first and iron in the pleats before starting the tufting process.  Anyhow, here is how it looked after stapling the fabric across the bottom (yes, I trimmed the thread and added more staples before pretending I was done):


And then after wrestling for hours (days?) with the top.  As you can probably see, there isn't enough extra fabric to make great pleats over the top of the headboard.


After consulting facebook, I decided to go ahead and install the headboard and live with it for a while.  If I decide I hate it, or if it gets dirty, I'll take it apart and try out my pre-ironing project.  In the meantime, I really love it.  I've leaned against it several times in the last week and it works exactly as I'd hoped.  It's a touch taller than I'd planned, which is a bit of a problem with the blind, but not so much that I've been bothered.

So here we are--a finished, tufted, upholstered headboard!

Oh, and the white stripe across the headboard is my iphone charger.  It's convenient, and y'all know I don't stage my photos!

What projects have you tackled lately?  Since I finished this "new" project, now I have to finish an "old" project before starting another.  I think the built-ins in the library are up next for us!

Friday, May 11, 2012

Week in Review

I completely fell back off the blogging wagon this week, but I had great intentions (and even thought about what I could write) every day!  Since I'd already been thinking about it, I decided to give you a full week in review.  To make it fun (and because posts with pictures are prettier), I'm going to tie every day back to this picture:


This is a picture of B, her mom, Baby E, Superman and Superkid

Melton Point Monday:  What have we been up to?  Well, St. R's 50th anniversary absolutely commanded our time in the last week.  Long days at work led up to the actual weekend, which was actually three events--Race the Rector (see pic), a Derby Party, and the 50th anniversary church service (complete with Dixieland Jazz band!) followed by Dinner on the Grounds.  Now, I was intimately involved in Race the Rector planning, but moderately involved in the other events.  J, as a vestry member and by extension of my role in all of it, got to be involved in most of these events, too.

Tuesday's Talents:  Look back at the picture above.  See what they all have in common?  Yep, the entire family received medals in their age groups.  So they all ran or walked (well, Baby E rode on B's back) three miles.  It's a pretty awesome family achievement, but I think the 'talent' part of this picture is Superkid.  He's six (remember when I made the cake for his party?), and he beat the rector!  The race was named Race the Rector, and everyone who beat the rector got a commemorative button.  While I fully expected plenty of serious runners to earn this designation, I didn't know if a small child could run the whole race, much less do so at a faster clip than Fr. J.  The Superkid definitely has a talent for this running thing.

Wordless Wednesday:  Well, this whole post is incredibly wordy, but you've got the picture above and I'll keep this part of the wrap-up brief!

Thankful Thursday:  When we woke up the morning of Race the Rector, it was raining.  Not just raining, mind you, buckets of water were falling from the sky, together with thunder and lightening. I was bummed.  It is so hard to drive around placing race signs while in your heart you know the weather is going to keep people from coming out.  B, in her awesomeness, had faith that the weather would break and brought her family (even her mom!) out to run.  She was right, thank goodness, and the streets were dry by race-time.  But even if they hadn't been, I am just so thankful to this family for not seeing the rain and rolling over and going back to sleep!  I'm thankful this week, too, for J who really gave so much of himself to help with the race (even walking the course in the rear of the pack to be sure everything went smoothly on that end with a bum knee).  Finally, not related to the race, but I'm thankful for the families at St. R who have just opened up their lives to me.  Last night I got to hang out at a Little League game with one family and tonight I'll be cheering on another youth at the High School Regional Track Meet.  I'm so thankful for this wonderful extended family that I've been given at St. R.

Fitness Friday:  Not my fitness (though I did walk a lot of miles in preparation for Race the Rector), but B's family above definitely deserves some recognition.  Superman is an elementary school PE teacher and obviously takes fitness seriously, but I just think it's so awesome that the whole family values fitness (especially B, who gets me out every Monday morning for a great walk!!).  With regard to our physical fitness, I'm still thisclose to my 25lb charm.  I'm not exercising nearly as much as I was, and I know this has something to do with stalling on the weight loss front.  J has hit a speed-bump in his fitness quest and we expect he'll be getting an MRI on his knee next week to determine how long he'll be sidelined.  We'll keep you posted!

Have a great weekend!

Tuesday, April 24, 2012

How to...update a console table

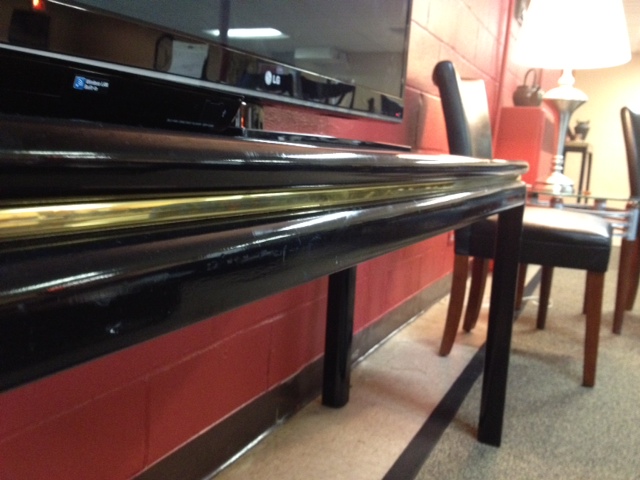
We (meaning Fr. J and I) bought a new TV for the parish hall at St. R last week.  Several groups use the parish hall for movie watching, but it's hard to get a group involved in a movie that's playing on a 24" screen.  We found a great deal and moved in the new larger flat screen on Thursday.  Of course, the old 24" TV is on a moving cart which the new TV just won't fit on.  In addition, none of the tables currently in the parish hall really work for a TV that size.  So we went "shopping" in the Sunday School classrooms and found a console table that was just the right size and shape.  Fr. J moved it into the parish hall and we got the new TV all set up.  And then I noticed that it totally didn't go with the rest of the furniture.  The furniture in the parish hall is brown stained wood with brushed stainless accents. The console table?  Black enamel with shiny gold accents.  Not even close to a match!

Gold trim looks great with that brushed stainless lamp and table accent, right?
Now, changing out the black is nearly impossible, and quite frankly at least it matches the TV.  Finding a way to change out the brassy gold accent seemed a much easier proposition.  I grabbed a Michael's coupon and headed off to find a solution.  That solution seemed to be silver leaf.  The package I picked up came with a glue-pen and several sheets of silver leaf. If you've never silver leafed something, here is a quick rundown of how to do it:
  • Use the glue-pen to cover the area you want to turn silver (and only this area--trust me, you do not want to get the glue anywhere else)
The left part of the trim has been 'glued'; the right part has not
  • Wait until it dries to tacky (The package suggests waiting 5-10 minutes.  I agree.  Don't try to rush it.  If the glue is still in liquid form, the silver won't stick and you'll have a mess.  Again, trust me.)
  • Press a sheet of silver leaf against the sticky area, rubbing it to adhere.
The silver leaf is on the bottom of the tissue-like paper.  You can see how  it would be important to keep the glue only on the trim and not on the table!
  • Peel back the paper that the leaf was stuck to.
  • Using a craft brush, dust away any bits of silver that didn't adhere.
Trim area on the left has been 'leafed'; the area on the right has not.
  • Lather, rinse, repeat until you're finished.
Here is the finished product!  While subtle, the silver leaf really ties in with the lamps and tables on each side of the table.  Altogether, I spent maybe fifteen minutes on this project and only used half the silver leaf.

Tuesday, January 24, 2012

How to...polish silver

I  mentioned on Saturday that the MP was being cleaned.  The cleaning lady and her crew were phenomenal, and that evening I realized that my silver coffee and tea service looked awful in comparison (read more about where the service came from and why it's so special to me here).  I was on the phone with my mom and mentioned it to her, and she (quite logically) suggested I polish it. 

Now, I know you're probably thinking polishing silver isn't really a talent, and probably not worth a How-To post, either.  I thought so, too.  But the more I thought about it, the more I recalled blogposts I've read where people talk about finding old silver trays, bowls, pitchers, etc. at estate sales or in antique shops.  Even if you don't have silver as family heirlooms, you quite possibly have something old and tarnished that you've picked up in one of these places, or even at a yardsale (like my Revere Bowl).  Polishing can bring new life into your old silver objects, and makes it so much more enjoyable!

So I asked mom her advice on the best way to polish silver, and she gave me the following instructions.  (Far easier than I'd expected, and completely effective!)  First, gather the following:
  • Silver polish (I have Hagerty's)
  • A clean, soft cloth (I used a regular cotton washcloth)
  • A sink full of warm (not hot), soapy water
  • A clean, soft towel  (I used an all-purpose cotton kitchen towel from Williams-Sonoma because it dried better than a non-cotton towel)
  • Another towel to place dried silver on
Start with the cloth and bottle of silver polish.  Pour out a small amount onto your cloth and rub it all over your piece of silver.  I'd almost describe it as buffing, and the polish will turn a grey color (and depending on how tarnished your silver is, your cloth may turn black).  Once you've covered the piece in polish, take it over to the sink.  Wash the silver in the warm water and immediately dry it using that dishtowel.  Be careful to handle the clean silver carefully, as your fingerprints will show!  Place your piece on the second towel to finish drying.

Want to see what a difference you can make?


On the left is the freshly polished sugar bowl; on the right is the still-tarnished creamer.  Huge difference, right?  Altogether, it took me under an hour to polish all five pieces of the coffe and tea service, as well as my Revere Bowl.  Insanely quick and easy, but totally worth it!

I'm linking up with Beth's Tutorials & Tips party, because I figure there have got to be more young women like me who aren't quite sure how to polish up the tarnished silver they've found!  Head over for more great ideas--there are some great DIY Valentine's items popping up over there!!

Home Stories A2Z

Monday, January 16, 2012

How to...Send a Party in a Box

My cousin had a baby last month. I was kind of busy wrapping gifts for everyone under the sun, and I sort of forgot about it (not about the baby exactly, just about the social norm of buying a gift before the kid is walking and talking). Finally, last Monday I managed to both remember the need to buy a gift and to find myself the time to pick one up. My friend K and I were running errands on the right side of town, so I swung into Babies-R-Us to find something. K is amazing at baby gifts (Seriously. I’ve seen her in action and considered slipping my inferior gifts back in my bag so as not to be totally upstaged by her awesomeness. She’s that good). We printed out the remaining items on the registry, and K led the way to useful baby products.

After filling my basket with a pile of pint-sized necessities, we headed over to giftwrap. It was right about then that I came up with my awesome packaging plan. One of the blogs I read is Dusty’s All Things G&D, and back in November she wrote a post called Birthday Party in a Box. Genius. Meet: Baby Shower in a Box.

Dusty uses flat rate boxes from the post office, but since I had a box upstairs that I thought would work, I tweaked the lining a bit.  Her suggestion to open the box flat and line the entire interior with one piece of wrapping paper is definitely superior.  I used one rectangular piece for most of the box and patched in the odd shapes.  On the other hand, I used spray adhesive (instead of a gluestick) which worked really well. Next time I’ll cut the paper her way and glue it my way. That should create perfection, I think…


After lining the inside of the box, I added a bit of tissue paper and the gifts:


To top it off, I added another piece of tissue and scattered some confetti I made. To make your own, just grab a hole-punch. My 1/8” hole-punch has a little plastic piece that catches the holes (dots?), which makes it much easier to corral your confetti!  Finally, I made a banner (out of the same cardstock I used for the confetti and a length of ribbon) that says Congratulations. Using SuperGlue, I attached each end of the banner to the flaps of the box. This way, when she opens it the banner will pop up and wave nicely. Cute, right?  You can't really tell in the picture, but the flaps hold the banner out over the package by an inch or two.


In all, this only took an hour or two to complete.  My method for papering the inside of the box definitely added time that I wouldn't need to include using Dusty's method. Regardless, it was time well spent.  For someone who is as committed to the presentation of the gift as I am, the Party in a Box idea definitely takes your gift to the next level, and isn't that what you want when you can't be there to present the gift yourself?

Let me know if you have questions!  Also, I haven't linked a tutorial to Home Stories A2Z lately (still Beth's blog, slightly tweaked name), but I thought this post might be worth a link!  Head on over for more great tutorials and tips!!

Home Stories A2Z

Tuesday, January 3, 2012

How to...remember this year forever

A few weeks ago, I stumbled upon a project on Design*Sponge that really struck me as a great idea.  It's a perpetual calendar/journal, and I ended up making one for myself as well as one each for my friends K & B as Christmas gifts. 

I pretty much followed the directions in the Design*Sponge post, so if you'd like to make your own, I encourage you to click over there.  The big differences for me were the monthly dividers (I cut up a sturdy calendar with beautiful pictures) and the container used.  Any rectangular container without a lid will work; I used metal boxes I found at Dollar Tree and took the lids off. 

The biggest concern from my recipients has been how to record your day in just a few words.  They're right; it isn't easy.  But, this is why it's worth it--  The cards I used have 13 lines on them.  If I use half the card to describe my day, then the calendar/journal becomes worthless in two years when the cards are full.  If I keep each day to one line, then I've got a useful calendar/journal for 13 years.  Certainly, if you're a journaler (is that even a word?), you'll want to keep your regular journal at hand.  This is more helpful for reflecting and remembering year after year.

Tuesday, November 22, 2011

...tied up with string

If you read last week's post about wrapping gifts, then chances are you came back this week to learn how to tie on your ribbon.

To recap, you collected these items before sitting down to wrap your gift:
  • A box, if your gift is not already in one. Boxes are infinitely easier to wrap than oddly shaped items (though personally, I love the challenge!).
  • Wrapping paper. You want a nice, medium weight wrapping paper. The super-thick (read: expensive) stuff is sometimes tough to get sharp edges and smooth folds with. The thin (read: cheap) stuff will rip when you try to pull the paper tight.
  • Tape. I keep both double-sided and traditional scotch tape on hand.
  • Scissors. I keep two pair on hand--one to cut paper and one to cut ribbon. Trying to cut fabric ribbon with scissors used mostly to cut paper will frustrate you and destroy the ribbon.
  • Ribbon. I love a two-inch grosgrain, because it makes beautiful simple bows. If you're going to make a fancy bow, use a wired ribbon. By all means, feel free to use curling ribbon if you like a pile of curly ribbon on the top of your package (and use the paper-cutting scissors for that one).  I'm using a one inch grosgrain ribbon in the picture below because it is easier to see what is going on.
...and you followed the instructions until you had a neatly wrapped package.  Now, you're ready to add ribbon to finish off the look.  I decided to do this tutorial mostly in pictures.  If you're at all a visual person, this will help.  If you're a word person, I'll try to explain what is happening in the pictures.

First, unroll a few feet of ribbon but don't worry about cutting it off the spool.  Make a loop with the end of the ribbon, about as long as you'd expect half of your bow to take.


Then, with your loop held in your left hand, stretch the ribbon horizontally toward the right side of your package, then down and under the package before coming back up the left side to complete one circuit around the box.


At this point, cross the ribbon over the loop-end and fold it down toward you.


Wrap the ribbon down the front of the package, underneath toward the back and back up to the top.


When you bring the ribbon to the top of the package from the back, pull it to the center of the package (where your knot will be), measure off eight or so inches (about as much as looped off at the start) and cut your ribbon off the spool.  Take the now-free end and slide it under the horizontal ribbon on the right side of the knot. 


Tie the two loose ends using an overhand knot and pull tight to be sure the ribbon wrapped around your package is snug.


Before we move onto tying the bow, ou might wonder why I suggest wrapping the ribbon this way.  It is, in all likelihood, different from how you've always done it.  Here's why:

When you wrap the ribbon around the box to the bottom, then twist it and bring it back up to the top to tie your bow, you're left with a knot on the bottom.  The knot will cause your gift to rock when you set it on a flat surface.  When you tie your ribbon this way, it smoothly overlaps on the base of the box.
To make your bow, make a loop with each end of ribbon (it should look like bunny ears), holding a look in each hand.


Tie the two loops using an overhand knot to create your bow.  When you do this, you may pull your loops too far which makes them a little floppy.  It's possible that you might like them that way, but I don't.  To tighten your bow and neaten your loops, pinch the inside of the loop and tug on the tail coming out of that loop.  This should simultaneously tighten the bow and shorten the loop.  Do this to both sides for an even bow.

Finally, finish the ends of your tails.  You can certainly cut across the ribbon on a diagonal, but I generally dovetail the ribbon.  To do this, fold the tail in half length-wise like this:


Then, cut across the folded ribbon at a 45-degree angle.  When you open the ribbon back up, it makes a nice dovetail.  If you fold the ribbon at all at an angle, instead of lining up the edges, your dovetail will be asymmetrical.  If you cut along a curve, your dovetail will be curved.


So there you have it:  a neatly wrapped gift with a professional looking bow on top (okay, this is an unwrapped gift box with a professional looking bow on top, but if you started with last week's tutorial, then you've got both the neatly wrapped package and the bow!).  Happy giftwrapping this holiday season!!


Like last week, I'm linking up with Beth's linky party.  Head over there for more great tutorials!

Tuesday, November 15, 2011

Brown paper packages...

This week's Tuesday Talent is so flaky it really might have qualified for a Finicky Friday post, but I just had to share it, and if you read through to the end, you'll pick up a How To's-day tutorial, too!


Yesterday, I had my first full shift back at the giftwrap desk at Williams-Sonoma. In five hours, I wrapped more than two dozen packages (most of them pre-wraps in anticipation of sales later this week and next). I had a bit of a slow start (it actually takes a few packages to get back into the groove), but I averaged under ten minutes to wrap a gift from start to finish and was thrilled when, at the end of my shift, I noticed one package was wrapped in five minutes (no, we're no timed; I was just keeping an eye on the clock at that point in the day).

So anyhow, here are my professional tips on how to wrap a present.  Note, this is part one--wrapping the gift.  Part two--adding a ribbon bow--will be posted next week to avoid an insanely long post today!

Before you start wrapping, collect the following:

  • A box, if your gift is not already in one. Boxes are infinitely easier to wrap than oddly shaped items (though personally, I love the challenge!).
  • Wrapping paper. You want a nice, medium weight wrapping paper. The super-thick (read: expensive) stuff is sometimes tough to get sharp edges and smooth folds with. The thin (read: cheap) stuff will rip when you try to pull the paper tight.
  • Tape. I keep both double-sided and traditional scotch tape on hand.
  • Scissors. I keep two pair on hand--one to cut paper and one to cut ribbon. Trying to cut fabric ribbon with scissors used mostly to cut paper will frustrate you and destroy the ribbon.
  • Ribbon. I love a two-inch grosgrain, because it makes beautiful simple bows. If you're going to make a fancy bow, use a wired ribbon. By all means, feel free to use curling ribbon if you like a pile of curly ribbon on the top of your package (and use the paper-cutting scissors for that one).
Now, on to the wrapping part of this tutorial:

Unroll enough paper to wrap all the way around your box, plus a couple inches. You might measure the circumfrence of your box and roll out that much paper, then cut it off to be sure you've got the right amount. Also, measure the width plus the height of the box (shown as the red line in the graphic below), and add a couple of inches to get the width of your paper. Cut (using the paper-cutting scissors!) so that your paper is the right size.
Set your package in the center of the paper, top side of the package facing down and top of the package facing away from you. (The paper that comes with a grid on the back makes this easy, but you don't need a grid. Just eyeball it!)

Pull the edge of the paper closest to you up and onto the back of the package. Secure with tape (I use the regular tape for this step. Then, reach across to the opposite edge and pull that paper up to meet the taped edge. It should overlap by a couple inches. Before you secure it, fold the edge over so it makes a neat edge (no one wants to see the rough cut edge). Secure the neatly folded edge to the package (I use the double-sided tape for this step. Just like no one wants to see a rough cut edge, I don't think they want to see tape).  When you pull the flap over to secure the edge, pull tightly so that the corners are crisp.  Otherwise, you'll have too much extra paper in the next step and your corners will be sloppy.

You should now have a rectangular tube of wrapping paper with a package secured in the middle. There are two ways to address closing up the ends. If your package is flat (like a shirt box or a jewerly box), I prefer method one. If your package is blockier (like almost anything else), I prefer method two.  (Note, in my explanation below, I refer to 'top' and 'bottom' flaps.  I've not moved my package, so the front of my package is on the table, and the 'bottom' flap will be folded up from the front of the package toward the back; the back of the package is facing up and the 'bottom' flap will be folded down toward the front of the package.  Clear as mud?)  
  • Method One: Fold in the front and back sides of each end and secure with tape (regular tape).  This will leave you with a triangle (or maybe a trapezoid) on the top and on the bottom.  Line the edges of the triangle with double-sided tape and fold down to the end of the package.  Then, fold the bottom flap up (without tape).  Notice how far up the package the tip of the triangle goes.  Decide how you want the end to look (flap to the end, flap folded over at the middle of the package).  Unfold it, add double-sided tape, refold and secure.  Repeat for the second end of package.

  • Method Two:  Fold the top side down and secure with regular tape.  Crease the front and back sides, which now look like right triangles.  Line the long edges of both triangles with double-sided tape.  Fold the back side (closest to you) flat against the package and secure.  Fold the front side flat against the package and secure that, as well.  Finally, decide how you want the end to look (flap to the end, flap folded over at the middle of the package). Unfold it, add double-sided tape, refold and secure.  Repeat for the second end.
As I mentioned in the first step, pull the paper tight so that your corners are crisp.  At this point, I pinch my thumb and forefinger together and run it along all of the edges to be sure my edges are well-defined.  It just looks nicer this way, doesn't it?

You should now have a beautifully wrapped package.  Next week, I'll cover accessorizing with ribbon and tying a bow.  I'm doing a gift wrapping training at our store for seasonal employees later this week, so maybe I can sneak pictures of  'good' and 'not so good' examples to share, too!

Finally, I'm planning to link up to Beth's linky party, so if you get here before I've linked to her blog, check back later in the day to see the other cool tutorials!

Home Stories A2Z

Tuesday, August 16, 2011

How to...Make a Cupcake Topiary, Part 1

I mentioned yesterday that I've been in DAR-world, and this is one of the projects that I've been working on.  To be fair, this project isn't close to finished, but I want to start documenting the process now so that I don't forget any of the details.  When it is finished, I'll be sure and link all of the parts together.

So first, let me give you the back story.  DAR members under 36 are called Junior Members.  I think that at some time there may have been some reason for the label, but now there is no difference between Juniors and non-Juniors.  One of the remaining distinctions is the Helen Pouch Memorial Fund--a fund operated by the Juniors (though supported by Juniors and non-Juniors alike) that supports our six DAR schools.  2012 marks the 75th anniversary of the Junior Membership Committee, and the cupcake has been selected as the Junior symbol during this administration (2011-2013). 

In Kentucky DAR, our Junior Club brainstormed the idea of making cupcake topiaries to use as centerpieces at our breakfast during state conference back in March.  One chapter, which has several Juniors, took the lead on researching the idea and created 8 topiaries.  Well, our President General was visiting during our state conference and she LOVED the idea!  The next thing we knew, the National Chairman of the Junior Membership Committee asked if we could make the topiaries for the 2012 Junior Membership Luncheon.  Now, this luncheon is easily the largest event at Congress and this year there were 85 tables, plus the head table.  If you've done the math, that means we're making about 100 topiaries!

The size and scope of this project demands that we streamline the project so that it is as easy to complete by as many people as possible.  Hence, the need to write down every detail in the process.  We're treating the March topiaries as our prototype, and perfecting from there.  Also, you'll notice that this project will be delivered next June/July.  Clearly, we're not talking about edible cupcakes.  Everything in this project is non-edible.


On with the Tutorial!  Step One--make your cupcakes!
You'll need: 
Mini Cupcake Pans
Mini Cupcake liners
Scotch Tape
Expandable foam  (I prefer Great Stuff Big Gap Filler in the black can)
Nail polish remover and cotton balls (for clean up)

1.  Roll little bits of scotch tape and stick a piece in bottom of each well in your mini cupcake pan.  As the foam expands, it will pull your cupcake liner out of the pan, leading to a misshapen blob of foam.  That's bad.  The scotch tape will hold your little cupcakes firmly in place.

2.  Stick a mini cupcake liner firmly into each well, making sure the tape sticks.

3.  Spray just a small amount of expandable foam into each well.  The GS BGF will expand by 50-60%. 

4.  When you've filled all of your wells, set the pans aside and immediately clean up.  I took off the spray nozzle and stuck a nail in the top of the can.  Then, I used a skewer to clear out the nozzle.  Finally, wipe everything down with acetone nail polish remover.  This early cleanup will save you a lot of time when start to make your second batch of cupcakes.

5.  Leave your cupcakes in the pan at least eight hours.  The foam initially sets pretty quickly, but it takes eight hours to set completely.  The pans will help the cupcakes hold their shape while they completely set.

6.  To remove the cupcakes from the pan, lightly grasp the top of each cupcake and twist clockwise, then couter-clockwise to loosen the tape.  If you applied it well, you can't pull the cupcake straight up without applying so much pressure you'll dent the top of your cake.

7.  Marvel at your adorable mini cupcakes!

Tuesday, August 9, 2011

How to...make a dragon's egg pinata

It's been a while since I've actually been really crafty, and this week I decided to do something about it.  Lucky for me, we had a birthday party to attend for a little boy we go to church with.  H is totally into dragons and knights and it seemed perfect to put together a couple of ideas I'd seen in the blogosphere.  The idea was sparked back in May with Young House Love did a tutorial on how to make a pull string pinata. H just turned nine and he has little brothers, so the idea of a pull string pinata seemed much safer than the traditional baseball bat type of pinata. Then last week I saw this blog post about making a dragons egg.  Put the two posts together, and *poof* crafty-ness ensues!

Now, I'm not certain that I've made a pinata since high school spanish class, so I was pretty much winging it.  Luckily, it isn't hard to make a pinata.  In a nutshell, here is my version of the instructions (Note, if you're starting more than 24 hours before delivery of your pinata, you  might want to click over to my two inspiration blogs for better instructions.  Otherwise, here you go--).

Materials:
Balloon (blow it up first to be sure your pinata will be the right size)
Several pieces of newspaper torn into one inch strips
Paper Mache mixture
Something to hang the pinata with while it dries
Paint and foam brush

Instructions:
1.  Start with your paper mache mix.  I just filled a bowl with warm water, regular white school glue and all purpose flour.  Wisk it all together until it makes a thick mixture.  Spread out newsprint to protect your table or floors from the mixture.


2.  Blow up your balloon to the appropriate size.  One at a time, dip strips of newspaper into your mixture, wipe off the excess gloppy bits, and stretch the strips of paper across the balloon.  Continue until the entire balloon is covered, then hang it up to dry overnight.  I put mine in a doorway of a room with a ceiling fan turned on so that it blew a little and dried evenly.  Also, I put a pan under the pinata to catch drips.


3.  This is where my pinata started to become a dragon's egg (as opposed to some other kind of pinata).  First I popped the balloon and pulled it out.  There will be a small hole where the balloon was knotted.  Don't worry about that just yet.  I used a small gauge wire to create a loop over that hole.  The loop will be used to hang the pinata later.  After I put in the loop, I painted the entire pinata a base coat of black paint.  Then, I saturated a short strip of newspaper in black paint and covered the open hole underneath the wire loop.  Because the paint was still wet, it adhered really well.  Hang the pinata to dry again.


The hole from the balloon knot.  Now you see it (above); now you don't (below).

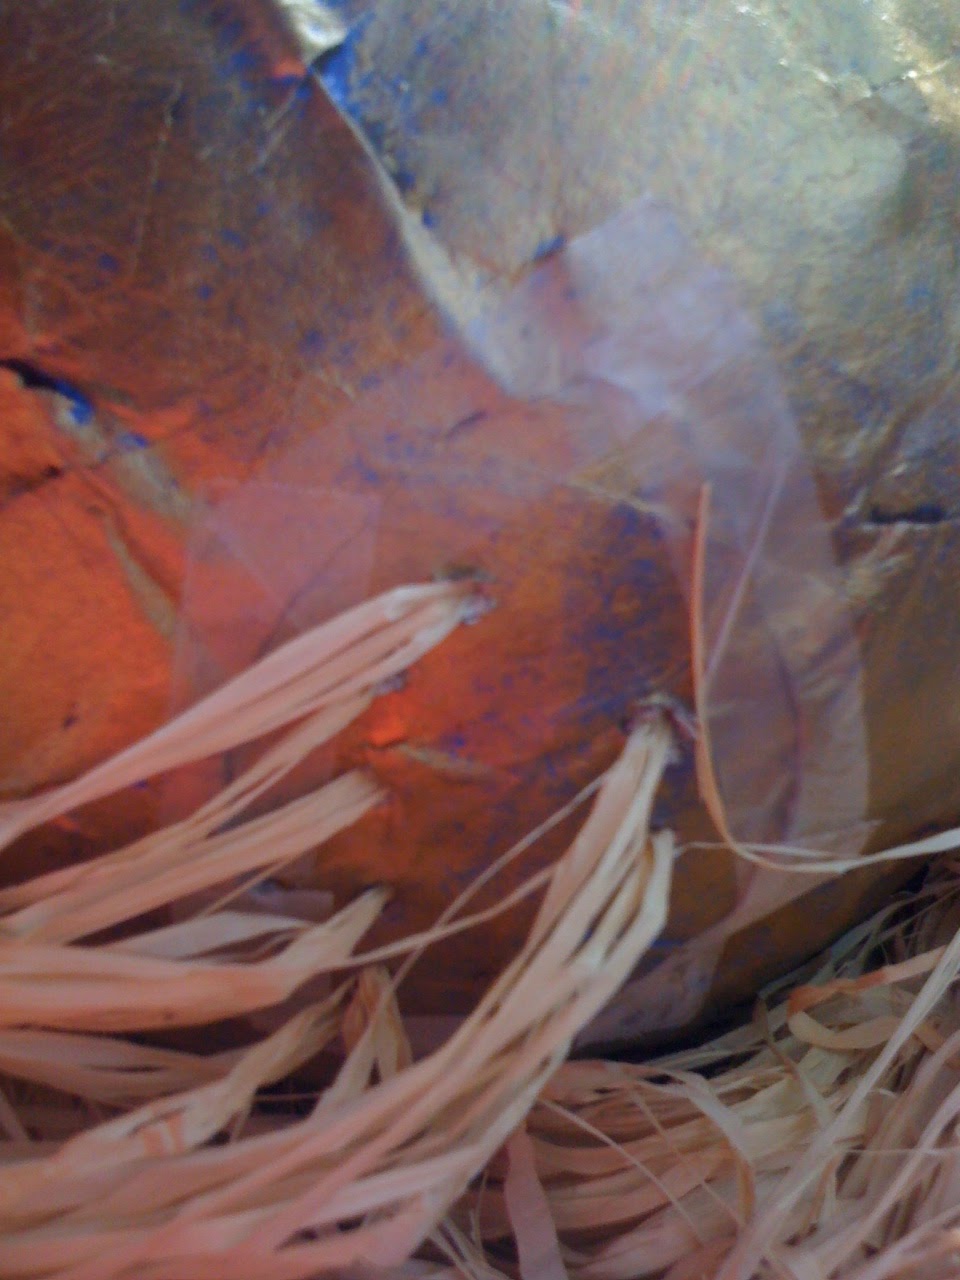
4.  My dragon's egg inspiration used several colors of paint to approximate a dragon's egg.  I only used two, and I don't know that it didn't turn out almost as well.  First, I sponged blue paint all over the pinata.  The black still showed through in some places, but coverage was pretty good.  Then, when the blue paint was just barely starting to dry, I sponged a metallic gold paint over the egg.  I think it turned out really well.  One one hand, I think that it would have been nice to paint the pinata with the balloon still blown up inside, but on the other hand, painting it after led to some really cool 'vessel-like' wrinkles on the surface of the egg.


5.  So up to this point, this is still just a paper mache egg.  To turn the egg into a pinata, I cut a medium size hole in the 'fat' end of the egg.  Fill the pinata with whatever candy or other filling you want.  Then, cut several strands of string (I used extra pieces of raffia left over from my dragon's nest) and punch holes in the flap you cut out of the pinata.  I knew that there would be ten or so children at the party, so I punched ten holes and strung raffia through each.  Secure the raffia with a knot, then place the flap back over the hole.  I used scotch tape to hold it all in place.  Note:  I'm not certain that I didn't put too much candy into the pinata for the scotch tape to support the flap.  I woke up the next morning thinking that it would have worked better if I'd had a larger circle to place inside the pinata and hold the candy a little better.


For the presentation, I picked up a gold charger from Michael's and created a nest out of raffia to place the pinata on.  I wrapped the strings of raffia hanging out of the bottom around as well and worked it into the nest as well. H recognized it immediately as a dragon's egg (success!), and I've since seen pictures of it being used in play with his brothers, too!

I've linked up this week to Beth's How To linky party.  Definitely check it out for some great tutorials!!

Tuesday, July 19, 2011

How to: Build a base/riser for a bookshelf

Okay, so I've already covered how we received our barrister bookshelves, and I think I mentioned that they would be placed in the library.  What I didn't mention is that they've actually been living in our living room for the last month.  Why?  Well, to be honest, because the basement floods.  A lot.  And I wasn't terribly inclined to put our "new" bookcases right onto a floor that could at any time magically transform into a swampland.  Solution?  A riser!
Now, you can totally purchase a riser made specifically for barrister shelves.  You can even purchase plans to build one.  I wasn't particularly interested in spending more money than necessary, nor in finding something that put form above function.  I just needed something to keep my shelves (and the books inside) dry.

One quick trip to Lowe's later (and yet another opportunity for Sandy to serve as family pick-up), and I was home with three 2 x 6's eight feet long, two packages of l-brackets with screws, and a small can of black paint (a pint?).  I quickly measured my bookcases and sketched out a plan, then mapped out the required cuts on the lumber.  Luckily for me, I only needed two of the 2 x 6's, so I got to return one on Saturday (J's car Irene actually got play pick-up truck for once!).


I took the wood outside to cut everything down (Note to self:  ask for a circular saw for Christmas--cutting a 2 x 6 with a jigsaw is tedious), then hauled it downstairs to put everything together. 


(Another note to self:  while it seems logical to put something together in the room in which it will be used, perhaps one should pre-drill holes outside...not on the freshly cleaned carpet...)


Putting the riser together was fairly simple. I'd purchased two packages of l-brackets, which come four to a package, and as you can see in the plan I sketched (above), I had two end pieces and a center piece for structure.  To be extra secure, I actually braced the center piece on both sides, I used all eight brackets.  To start, I pre-drilled and secured all of the brackets to the back piece.  Then, I attached the short pieces, and then finally attached the front piece. 


Finally, after everything was securely screwed in place, I painted the outside of the riser black.  Why black?  So that visually, it will fade away when someone looks at our bookcases.  While I wanted the extra height that the 2 x 6 offered in a riser, I do sort of wish I had just used a 2 x 4, which would have blended better with our baseboards in this room. 


For a quick and easy project (that got the bookcases out of our living room and into the basement where they belong), I'm happy with the end result!